
This guide will walk you through the process of creating, configuring and managing discounts, covering everything from basic percentage or fixed-amount discounts to more advanced options including usage limits, expiry dates and code specific rules.
Click on Financial and then Discounts:
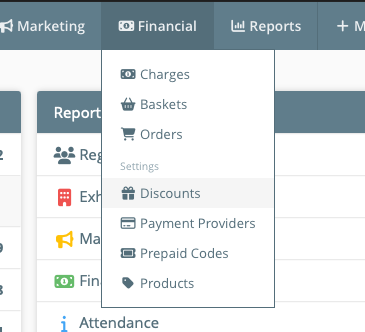 Financial discounts menu
This is the discounts grid / list, from here you will see a list of all existing discounts on this campaign:
 Discount grid example
Discount - The title and code (if applicable)
Type - What type of discount is applied
Usages - How many orders this discount has been used on (You will see the number of usages or 'X of X' if it has a limit)
Valid From / Valid to - The dates during which this discount is active
Active - If this discount is active or not (Not impacted by the valid from / valid to dates, this is an overarching active status).
You can amend any of these details by clicking 'View' on the left hand side.
Creating a New Discount
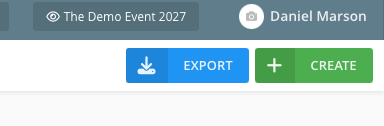
From the discounts grid, click on 'Create' in the top right hand corner:
The next page shows a number of options for the type of discount you are creating:
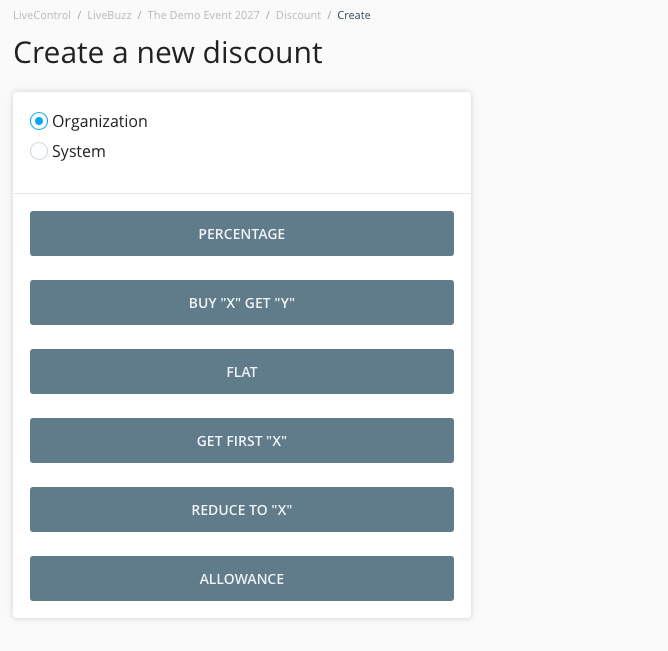 Create discount type
Discount Type Settings
Organization vs System - In LiveControl all financial elements sit on either side of this divide. Payment Providers, Products, Baskets, Orders and Discounts are all either for an organization or for the system. Organization being on behalf of organisers, System being on behalf of LiveBuzz / LiveControl. When creating discounts this page normally defaults to Organization, which for most organisers is the right option.
Percentage - One of the easiest discounts. Used to apply a percentage discount to a basket. '50% off registration price' for example.
Buy "X" get "Y" - Used for multiple purchases where if you buy 2 tickets you get 1 free for example.
Flat - Another very simple discount type, used to reduce the price of a product by a set amount. "£45 off"
Get First "X" - Another discount type for multiple purchases, can be used to get the first product for free when buying 3 for example.
Reduce to "X" - Similar to flat, this discount will reduce the price of product to a set amount, ignoring early bird rates for example.
Once you have picked the discount type, you will then need to enter the details of the discount:
- We'll run through the mandatory fields first, then introduce some more advanced settings.
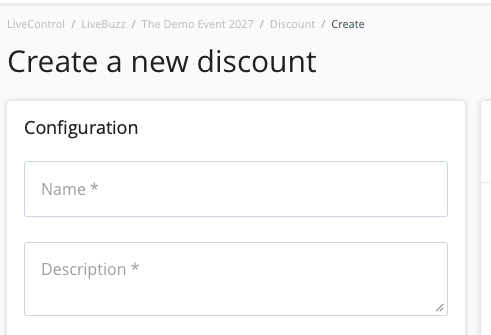
- You need to give the discount a name and a description. They can be the same thing if you want, but description allows for a little more detail to be added:
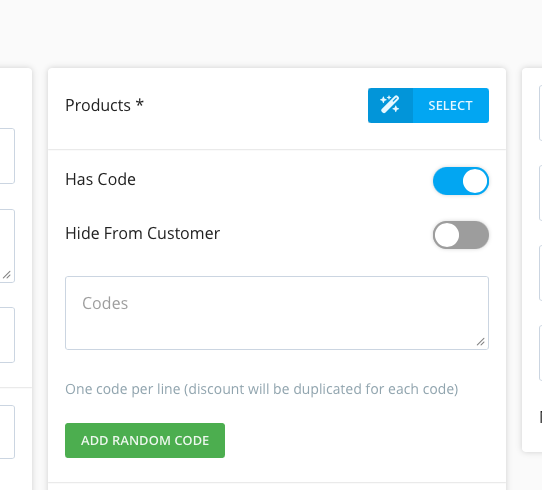
- You'll need to specify which products your discount applies to, click on 'select' to bring up the menu of products.
This column is also where you specify a code if you want your discount to only be available when the code is entered. If you wish to create multiple 'codes' at the same time, then enter them here, one per line.
-
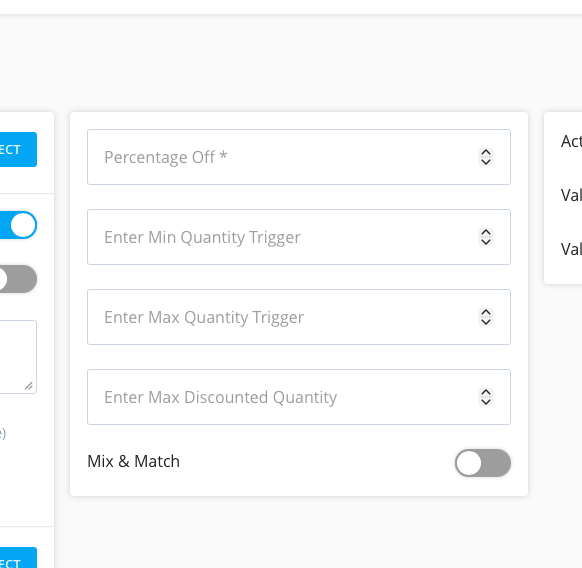
The third column will differ slightly depending on which option you have chosen, but here we have the top box available to us for the discount percentage:
-
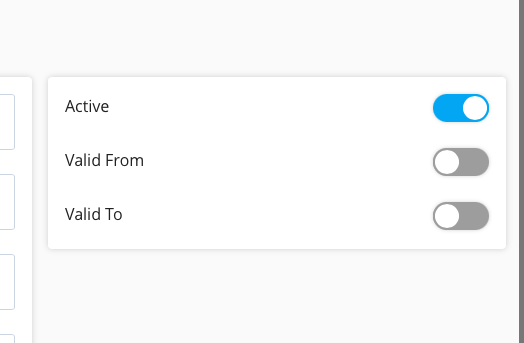
The forth and final column will have the overarching 'active' toggle as well as the valid from / valid to dates:
-
When all of this is ready, you can click on 'Save Discount' in the top right hand corner.
Advanced settings
This section will cover all of the extra settings you may have seen while creating your discount.
Limited Number of Uses - This setting will limit the number of times this discount can be used. Note, this is per order, so an order containing multple products on the same order would still count as one 'use'.
'Has Code' and 'Hide from Customer' - Why would I not have a code? Why would I hide it from a customer? - Discounts sometimes apply without the use of a code, an early bird for example applies automatially without entering a code and uses the valid from / valid to dates to ensure it's applied on the correct price break dates.
Hide from customer is useful when the discount you are creating is for internal use and is applied directly to customer baskets, you might not want the customer to see the discount / code incase they share it with other people.
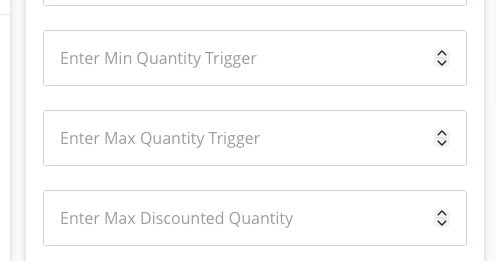
Enter Min Quantity Trigger - This can be used instead of a code to trigger the discount, when a basket contains this number of products the discount will apply.
Enter Max Quantity Trigger - Similar to above, this is the number where this discount will stop applying.
Enter Max Discounted Quantity - This is the maximum number of products that will be discounted per order using this discount.